
Sign in to your AWS Cloud server with the IAM user credentials. This will ask for your Account Id, IAM Username, and Password. Fill up your details and this will open your AWS Cloud Service Dashboard.
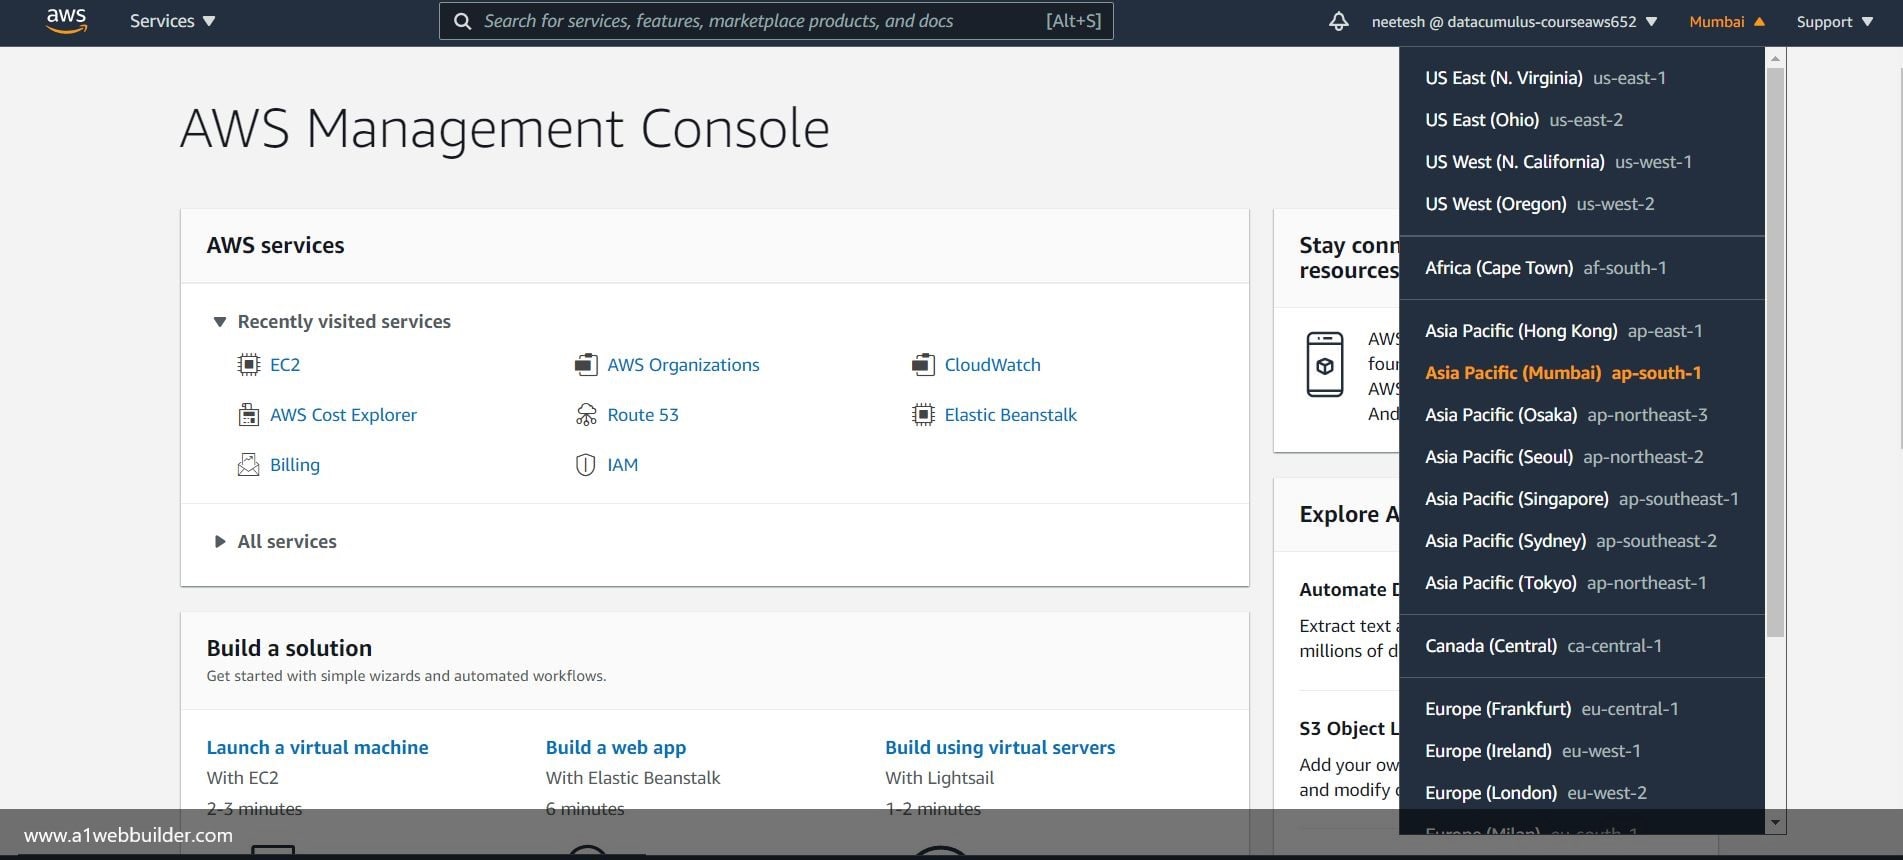
On the top right corner of the AWS dashboard click on the location and select the AWS server closest to you or optionally select any other server for your preference. This gives you an advantage since it will reduce the server response latency when you are hosting your website.
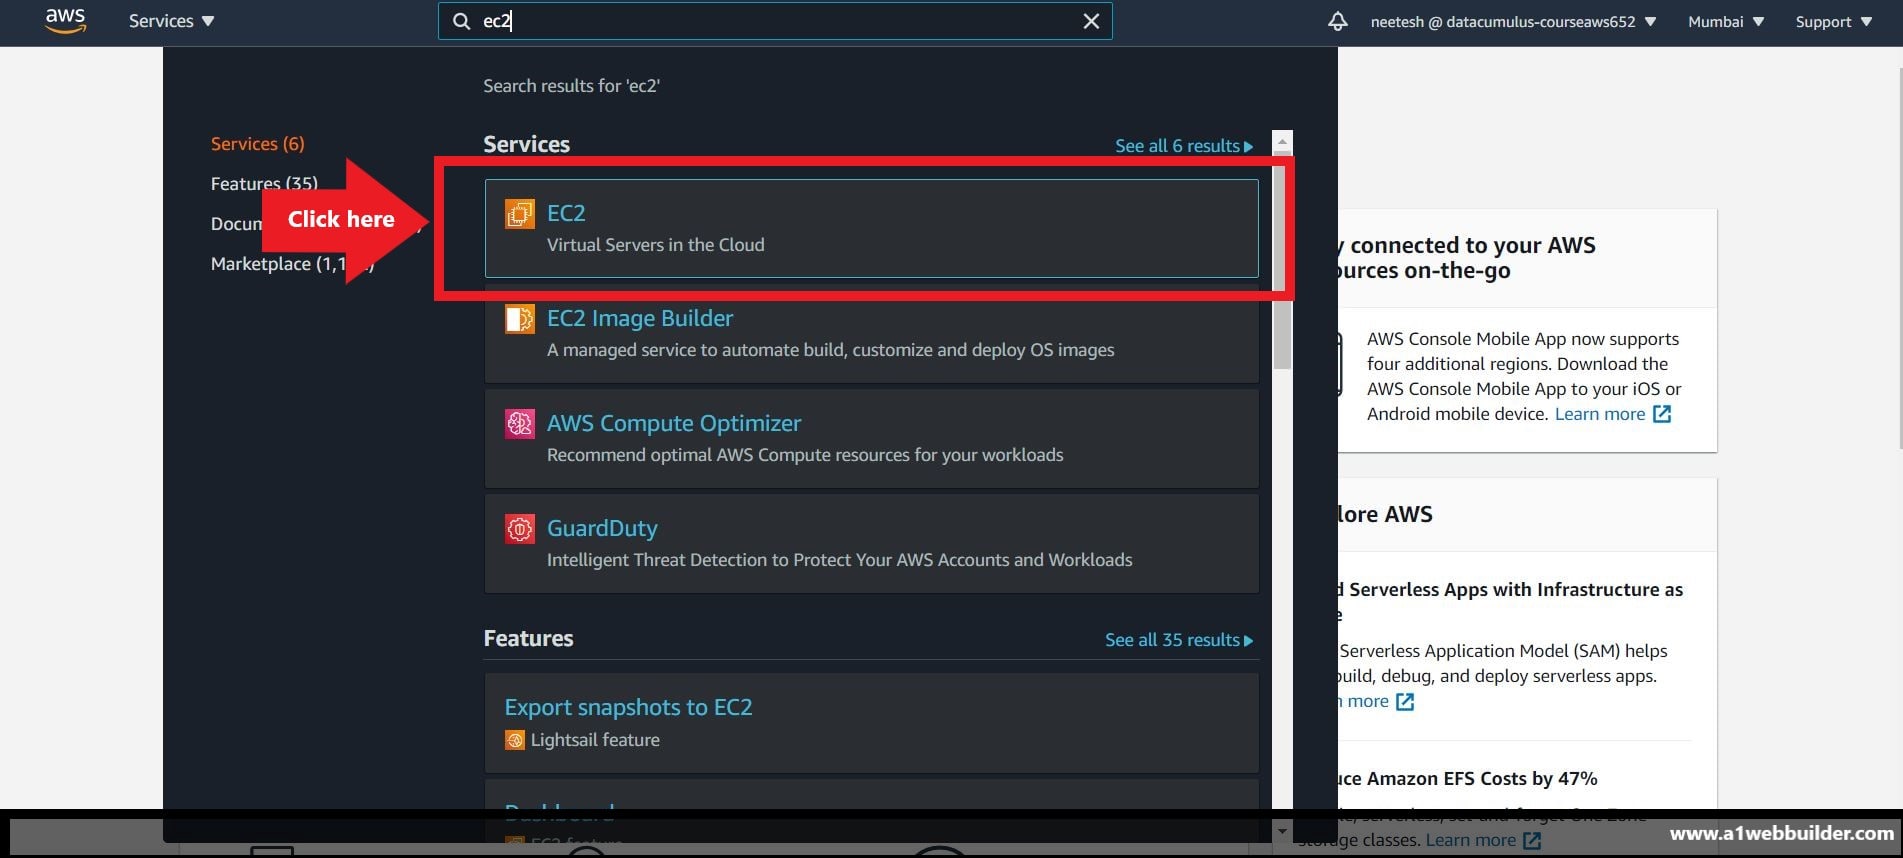
On the top bar there is a search field, now type EC2 in this box and it will automatically filter EC2 from the given list. Select the EC2 instance, this will open a new dashboard where you can create/set up, manage, delete your EC2 instances.
For this, you need to download and install PuTTy on your computer.
You can download PuTTy from this URL link: https://www.chiark.greenend.org.uk/~sgtatham/putty/latest.html
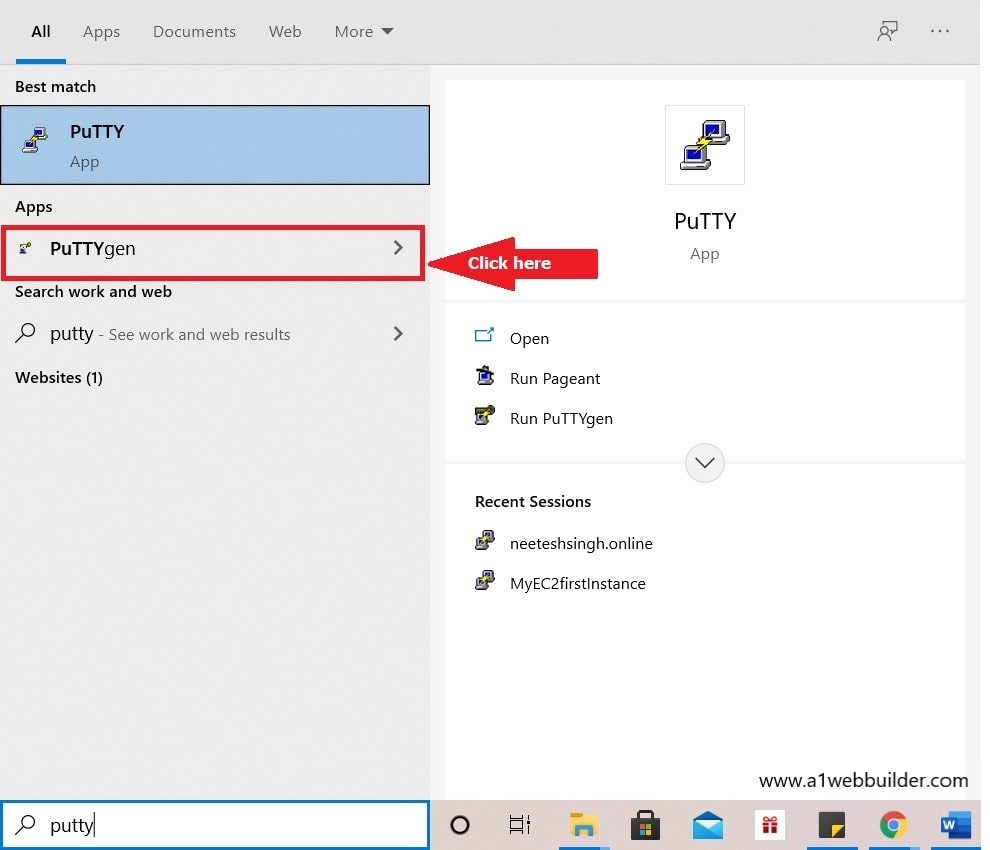
Once you install PuTTy On Windows Desktop, in the search field type puttygen
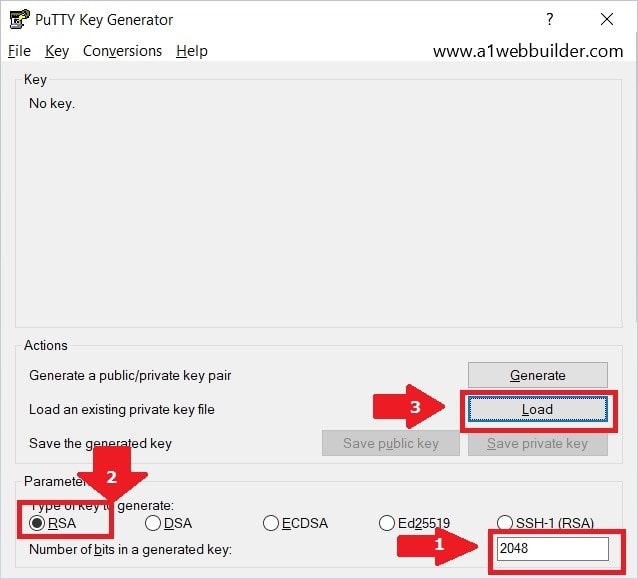
Keep the parameters of PuTTygen as Type RSA and Number of Bits generated as 2048 then click Load Button
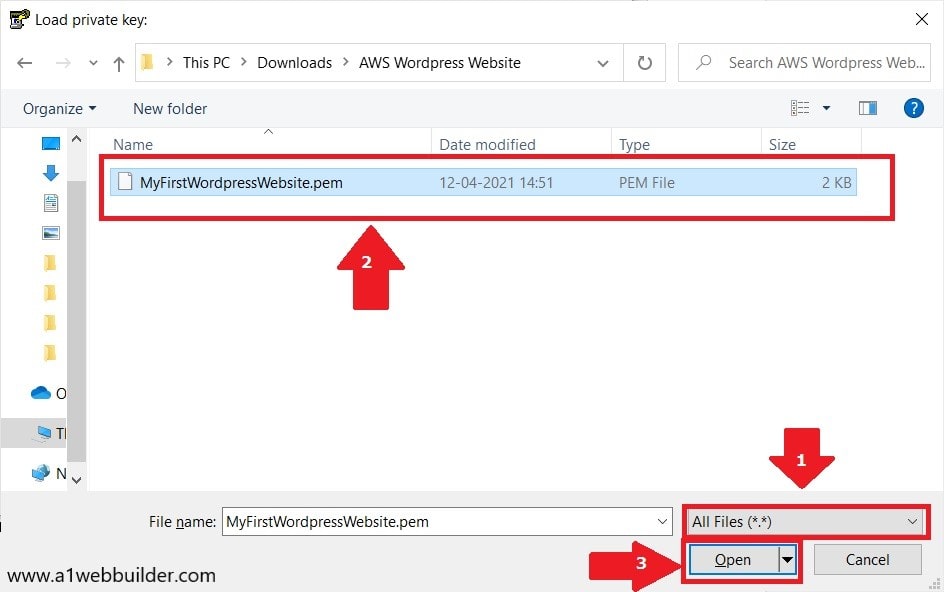
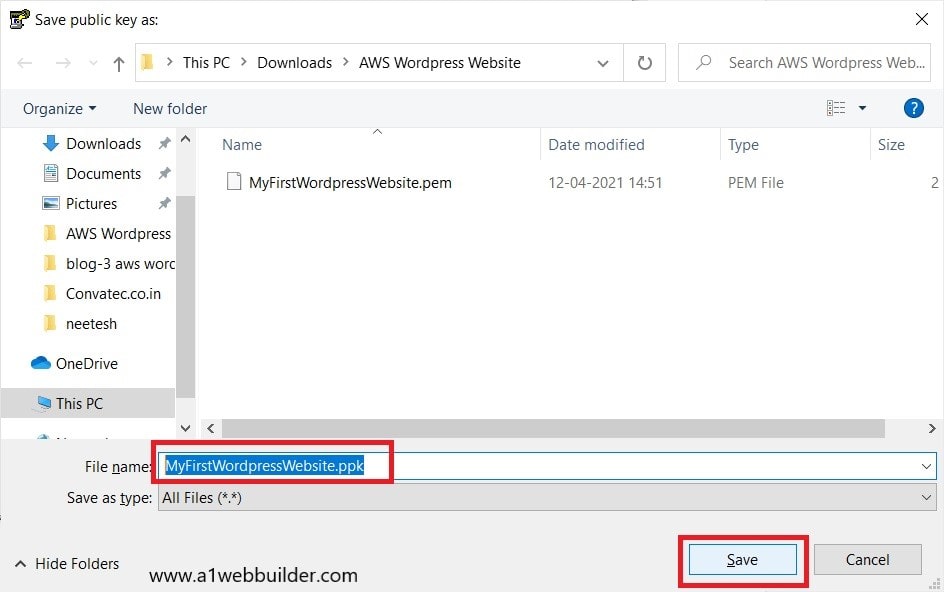
Save the file as .ppk and save it.

Now go to desktop and search for PuTTy then open putty.
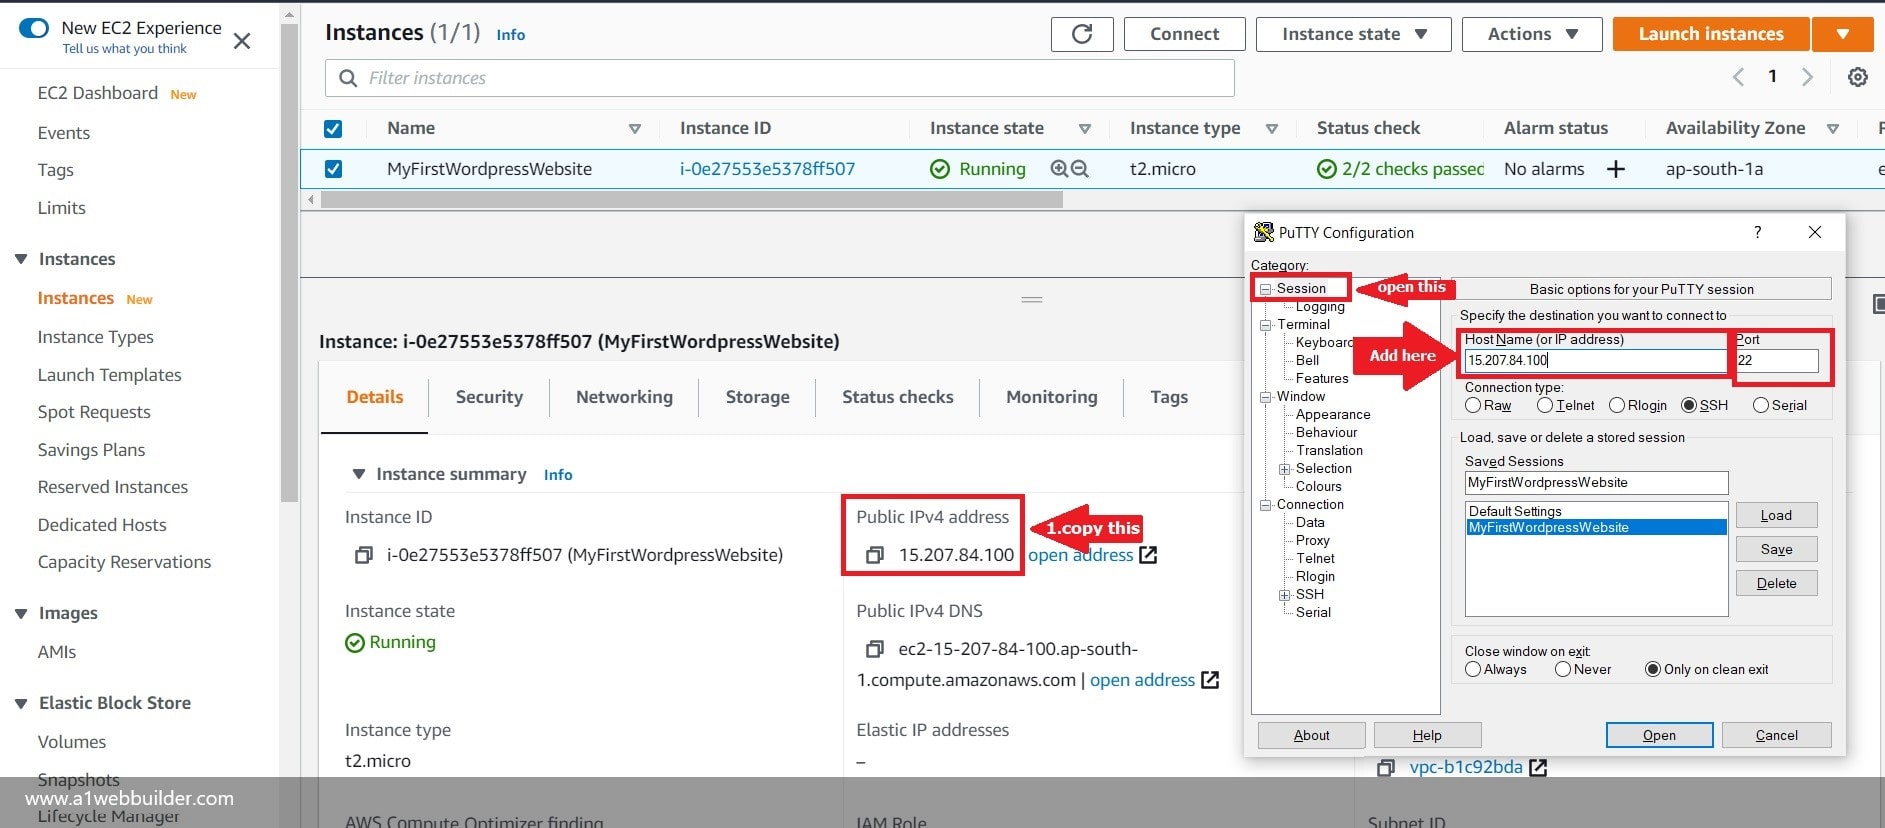
You need to first copy the public IP Address from the selected WordPress EC2 instance, after you copy the instance Public IP Address go to PuTTy open session from the left panel and paste the Public IP address. Keep the PORT as 22.
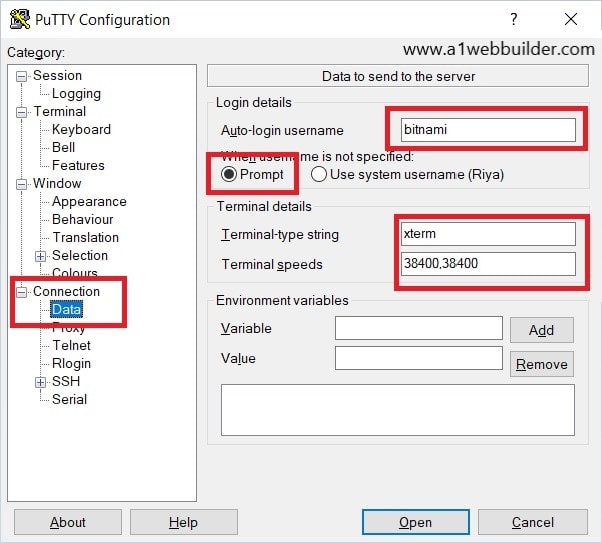
Click on Data from the left panel. Auto-login Username as “bitnami” and Terminal-type-string as “xterm” and Terminal speed as “38400.38400”
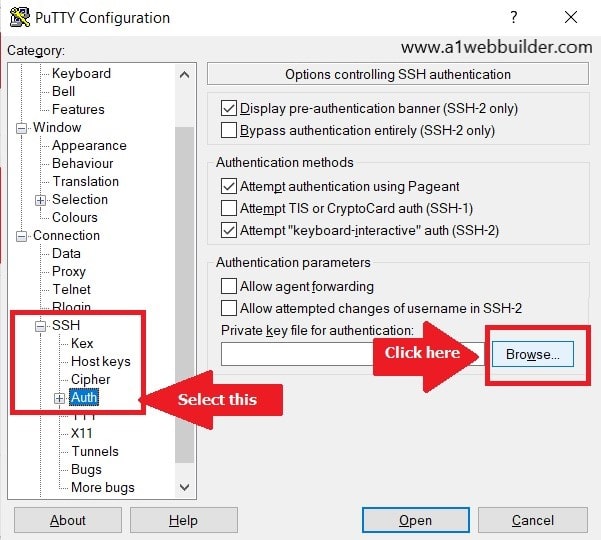
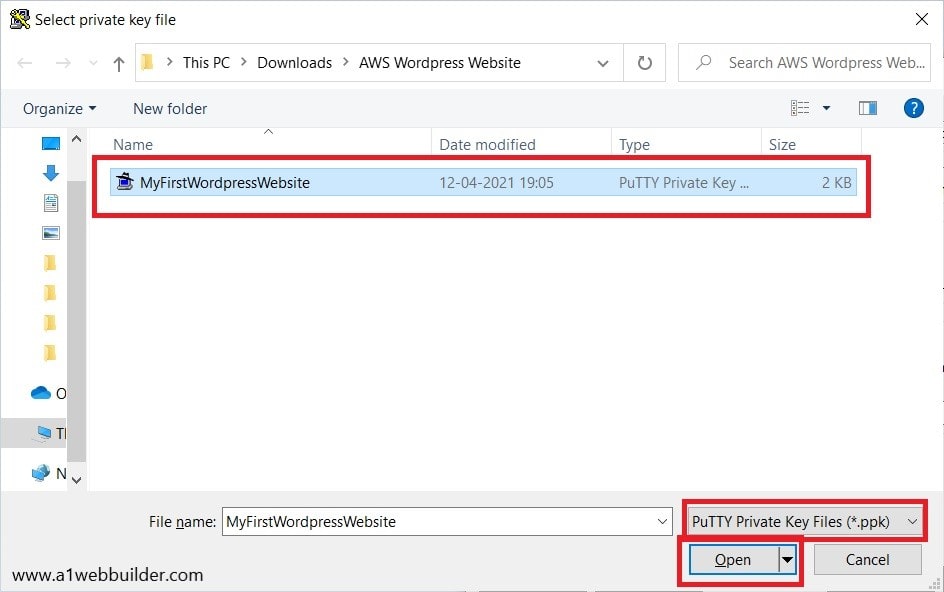
Under the SSH click, AUTH inside this tab click open browse tab, locate the .ppk file that you created using PuTTygen and open this file.
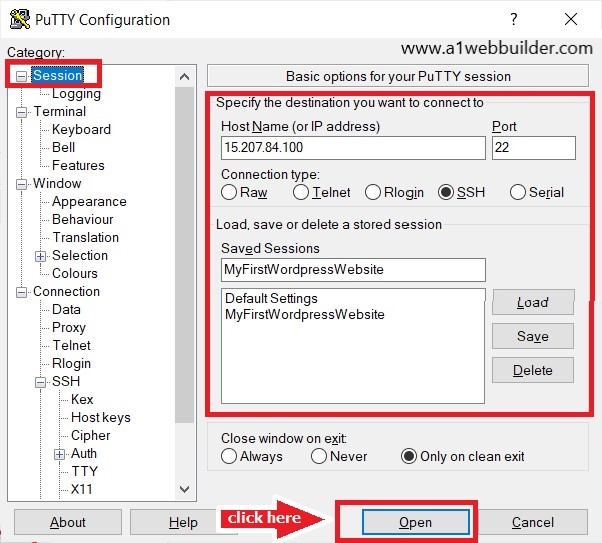
Go back to the session tab inside putty and make sure all the settings we did remains the same. Now click on the Open button this will securely SSH(connect) to your EC2 instances.
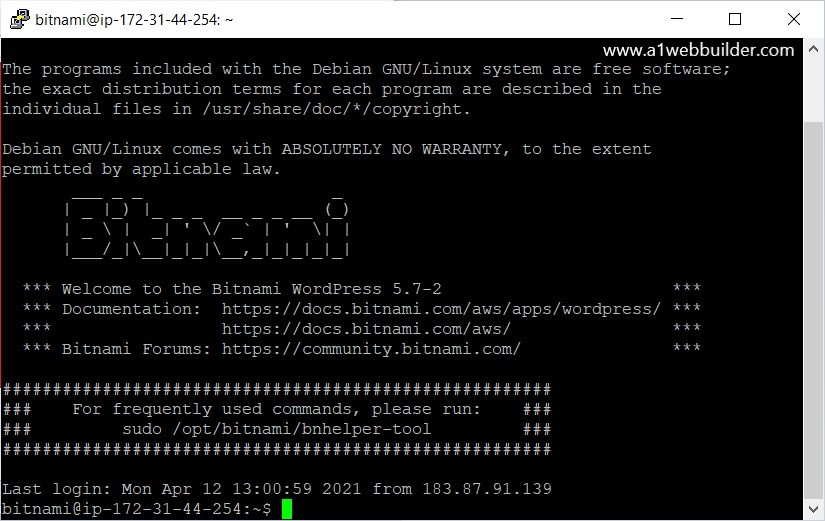
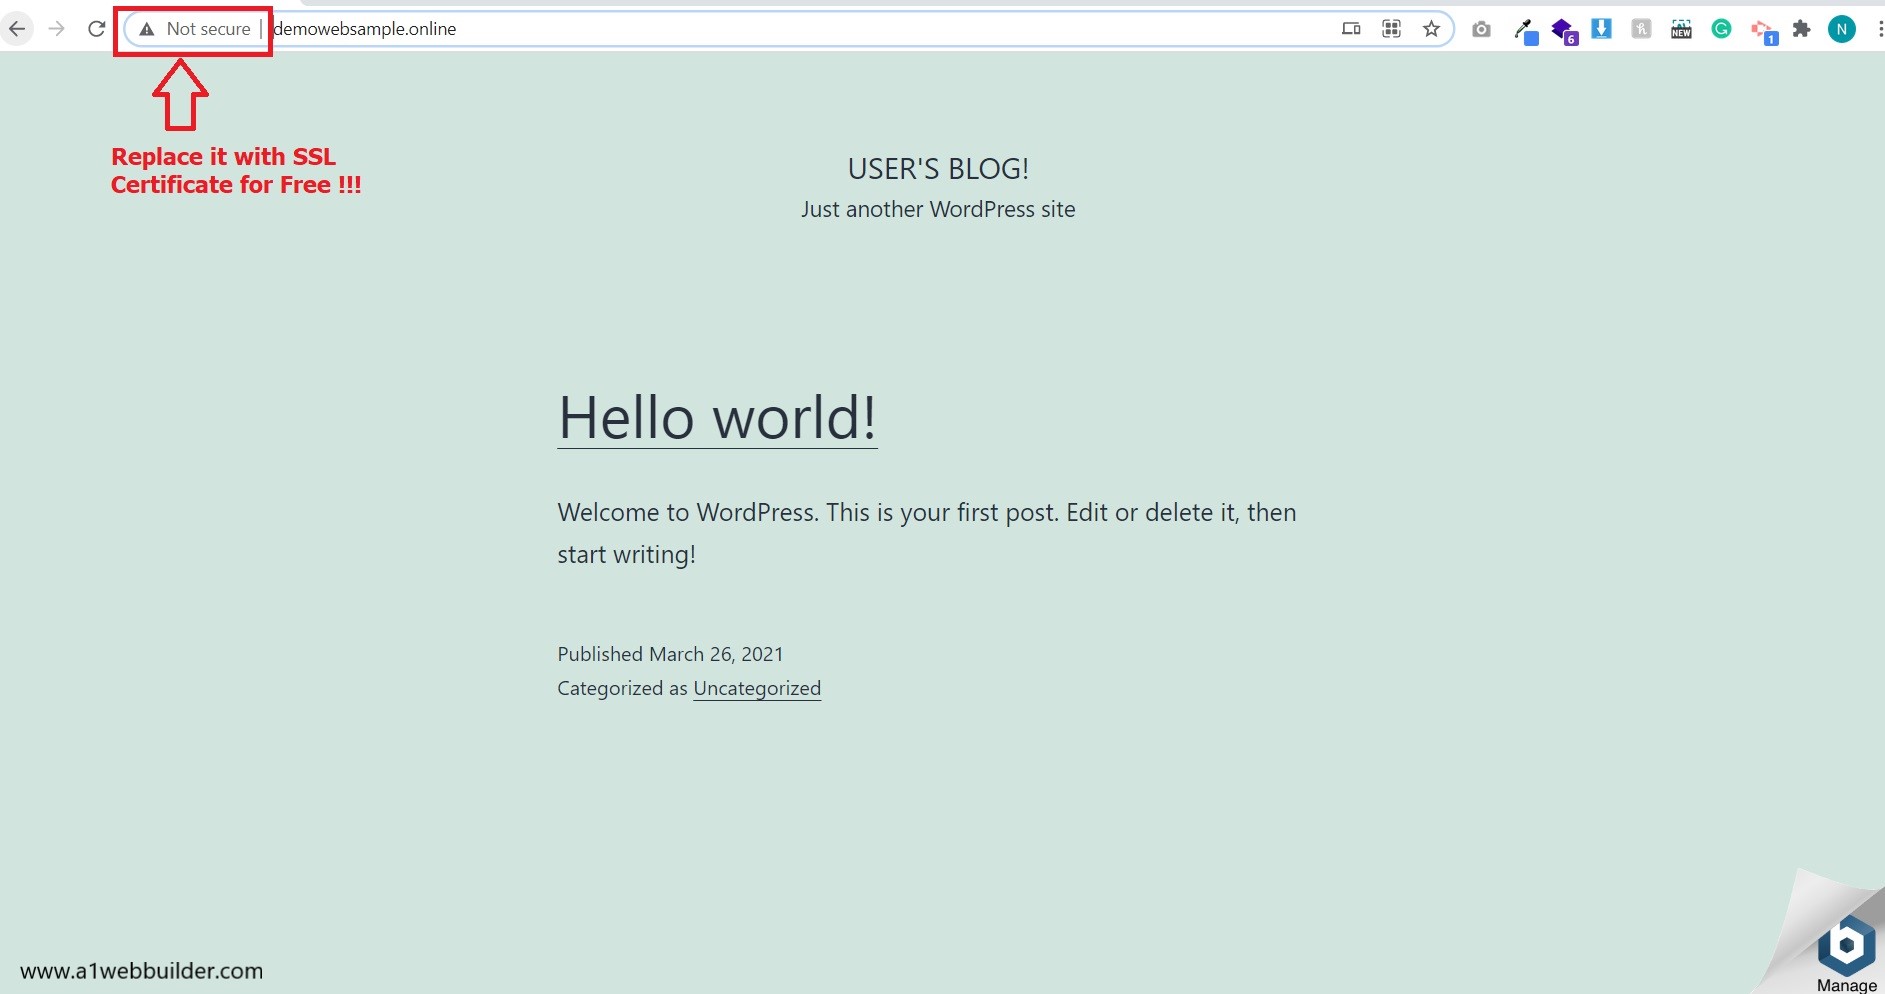
Once your command prompt is open type these simple command to add SSL Certificate
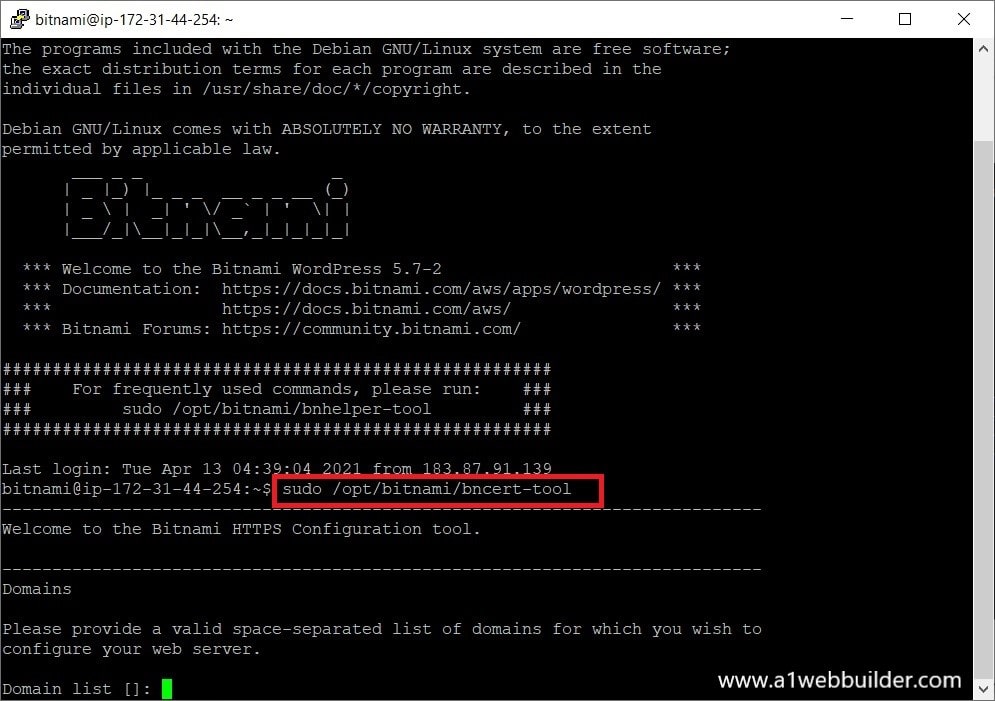
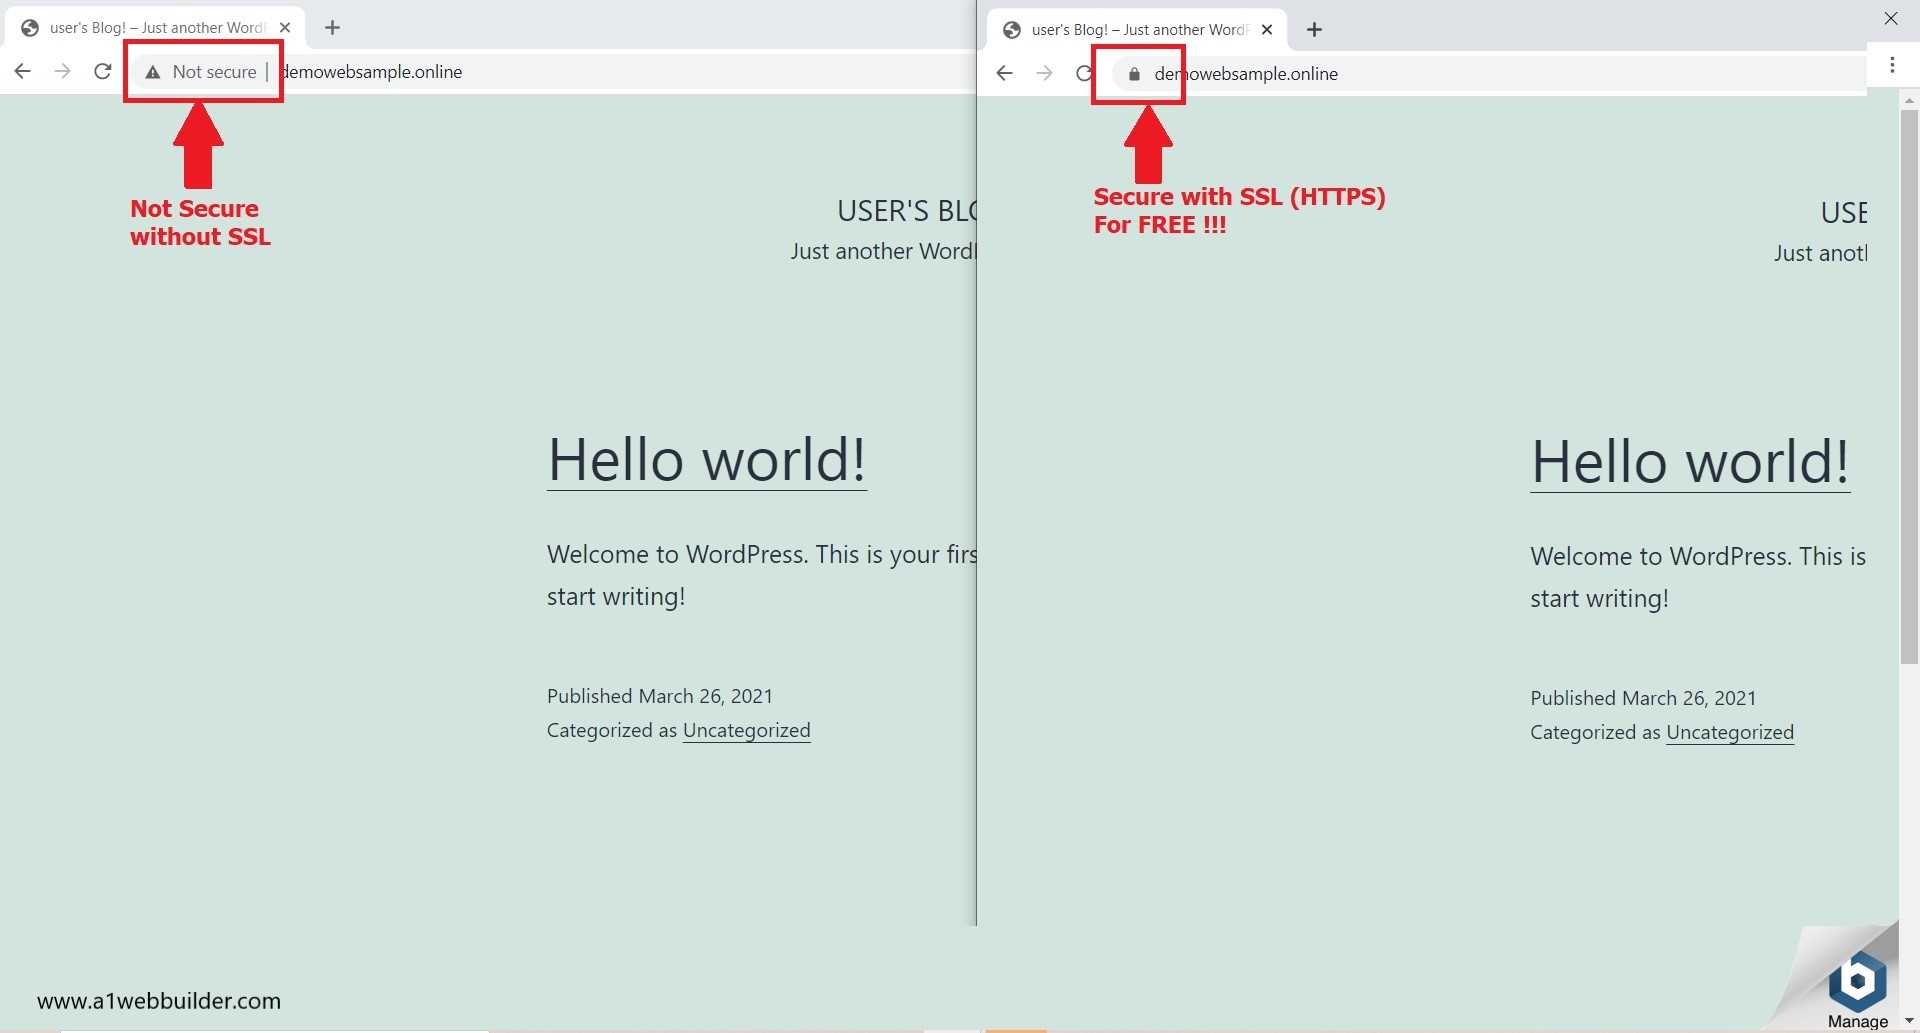
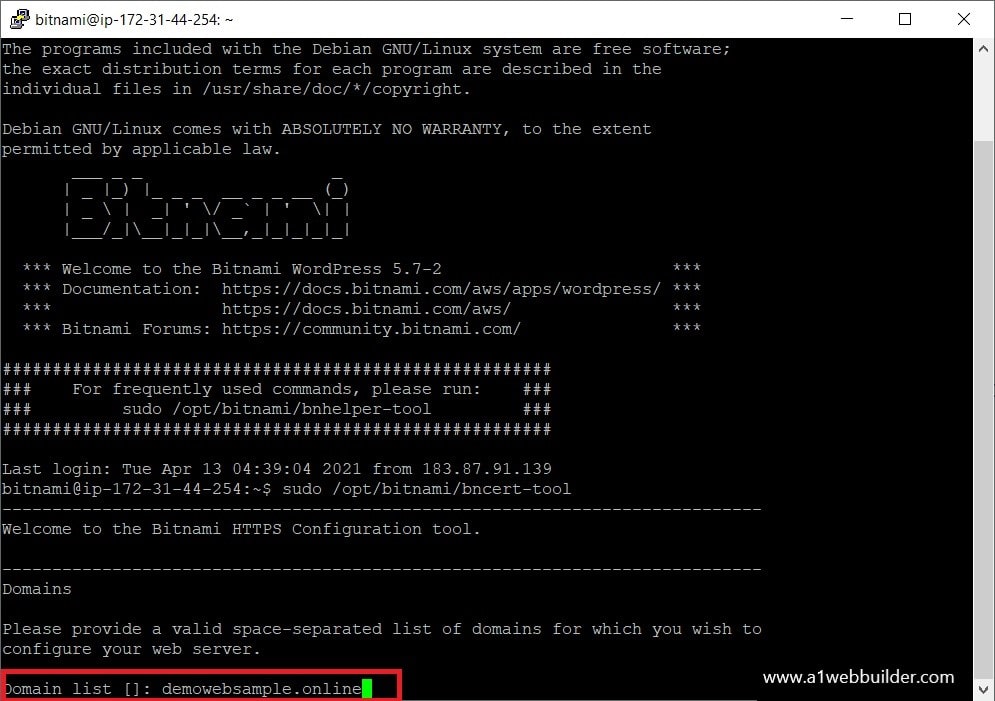
Once you enter this command your SSL(HTTPS) setup by Bitnami will start its process. In this step, it will ask you to enter the website domain name for which you want SSL to be activated. Simply type your correct domain name in the command line which you managed using the AWS route53 service. In my case its “demowebsample.online”
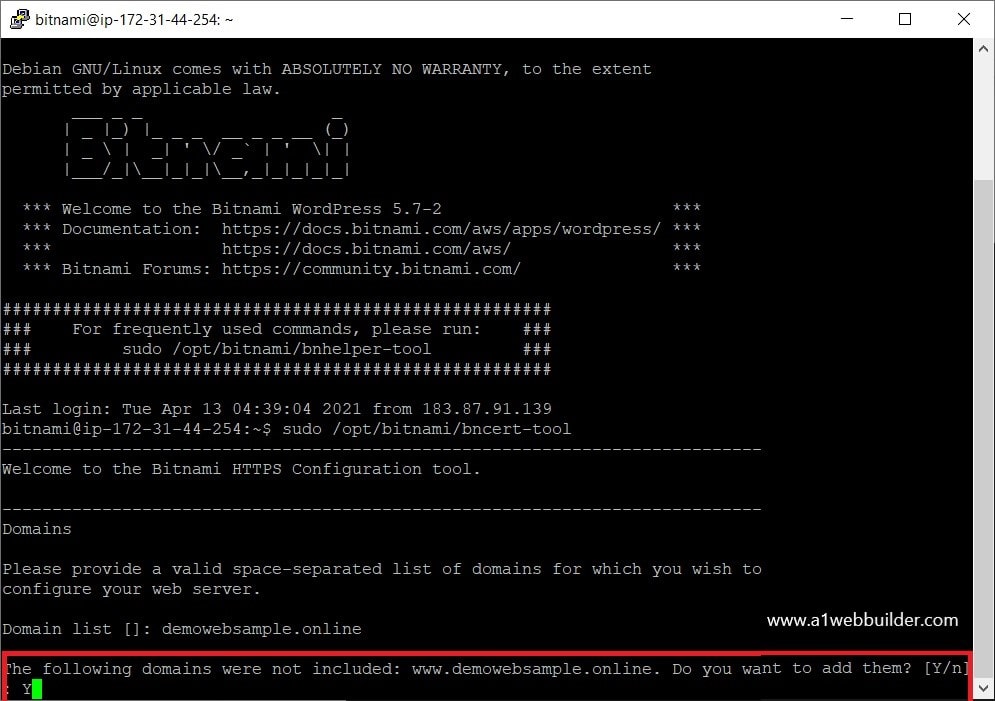
It will give a prompt to include the domain name, simply click “Yes” and enter.
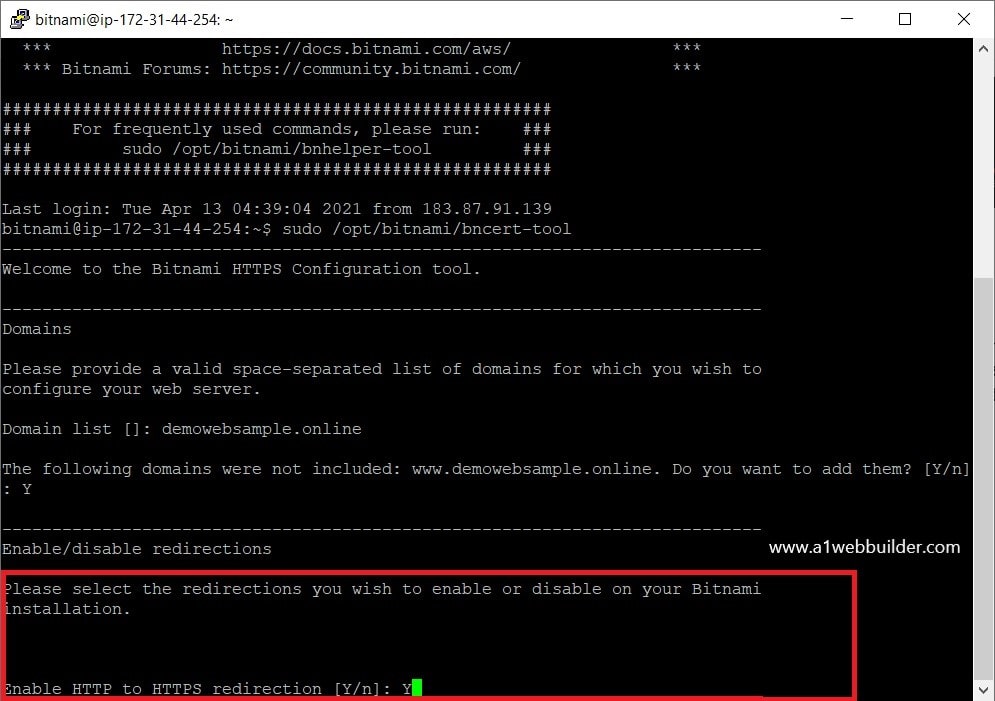
In the next prompt, it will ask for redirection of your website from HTTP to HTTPS, press “y” and enter to allow redirection to HTTPS.
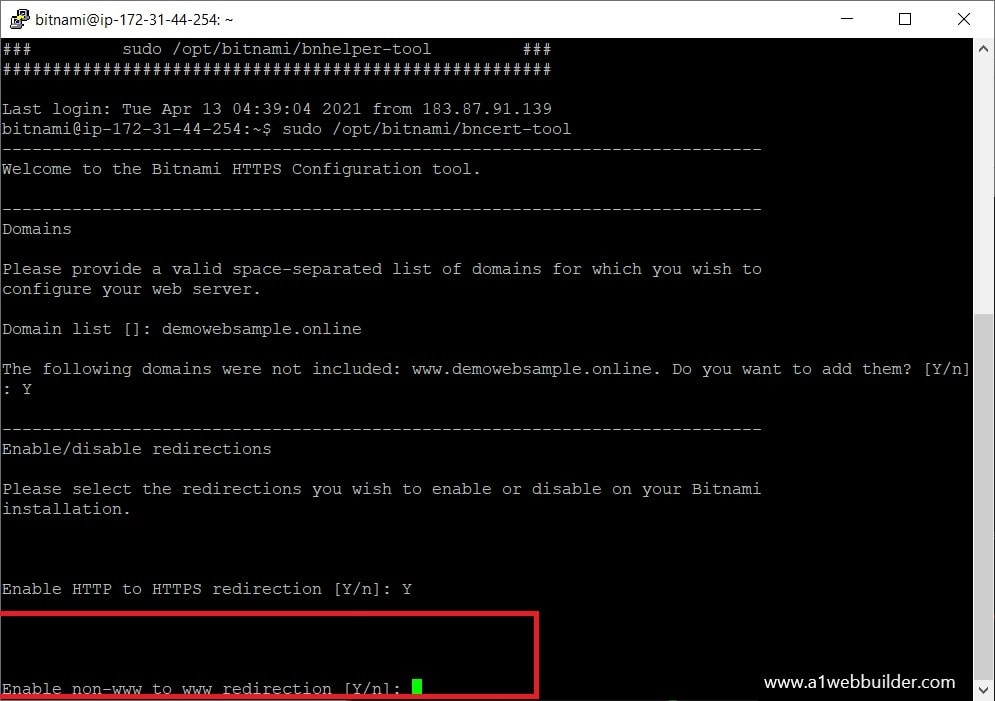
In the next prompt, it will ask for redirection of a non-www website to www, press “y” and enter to allow redirection to www.
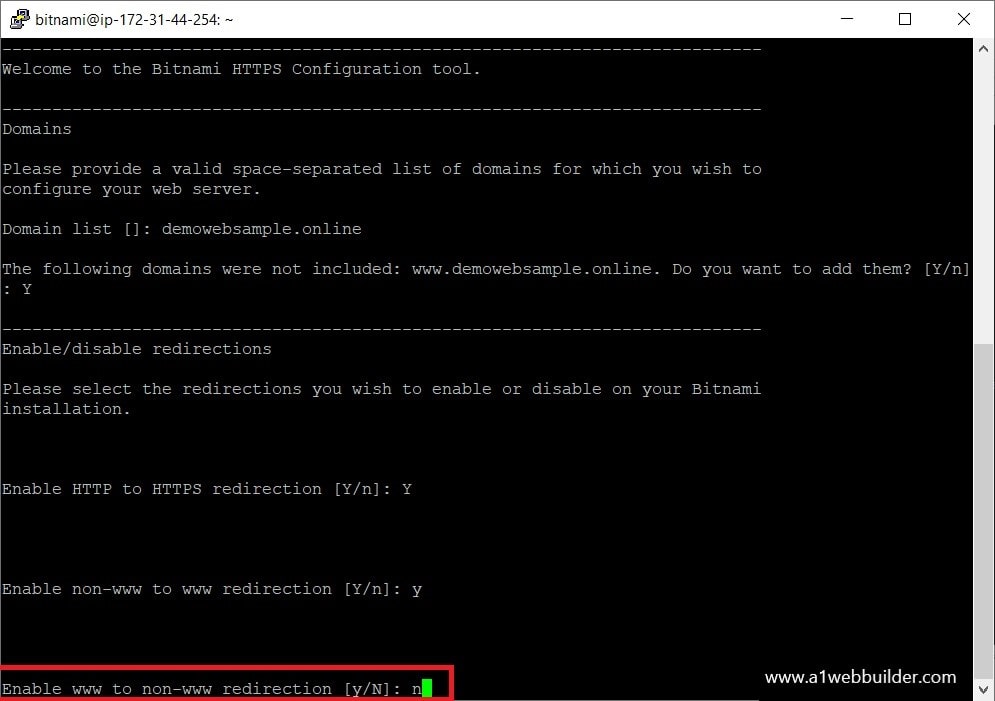
In this prompt, it will ask our permission to restart the server to apply SSL and redirection set up on the domain name that you entered. Press y and it will complete the process.
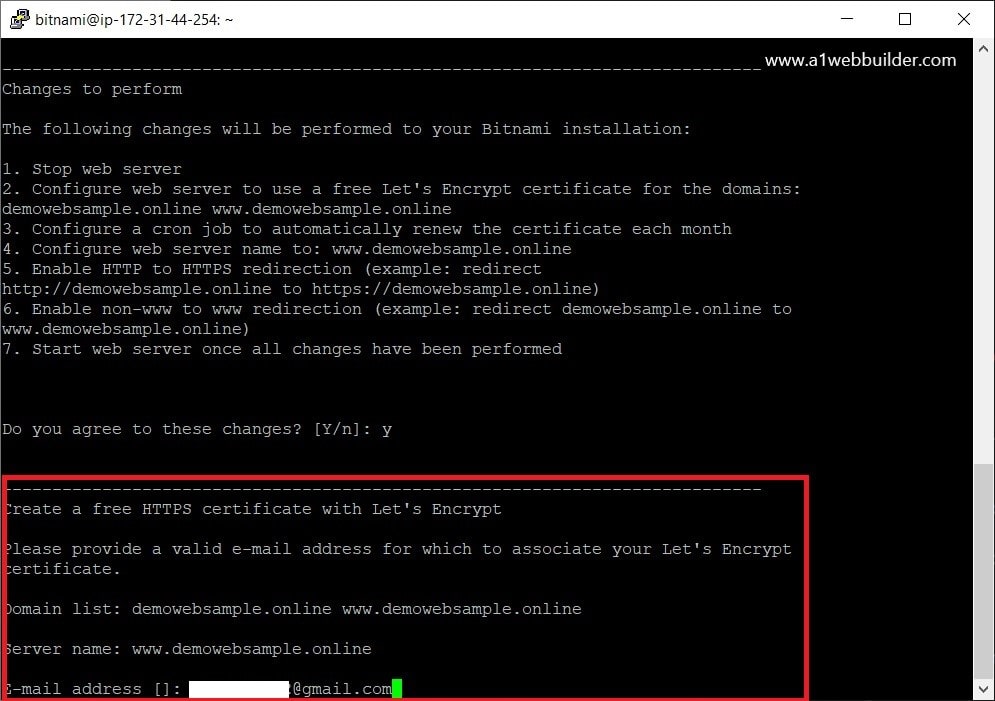
Coming to our last prompt it will ask for your email address, you can enter your email address to associate it with SSL Certificate and finish up with the setup.

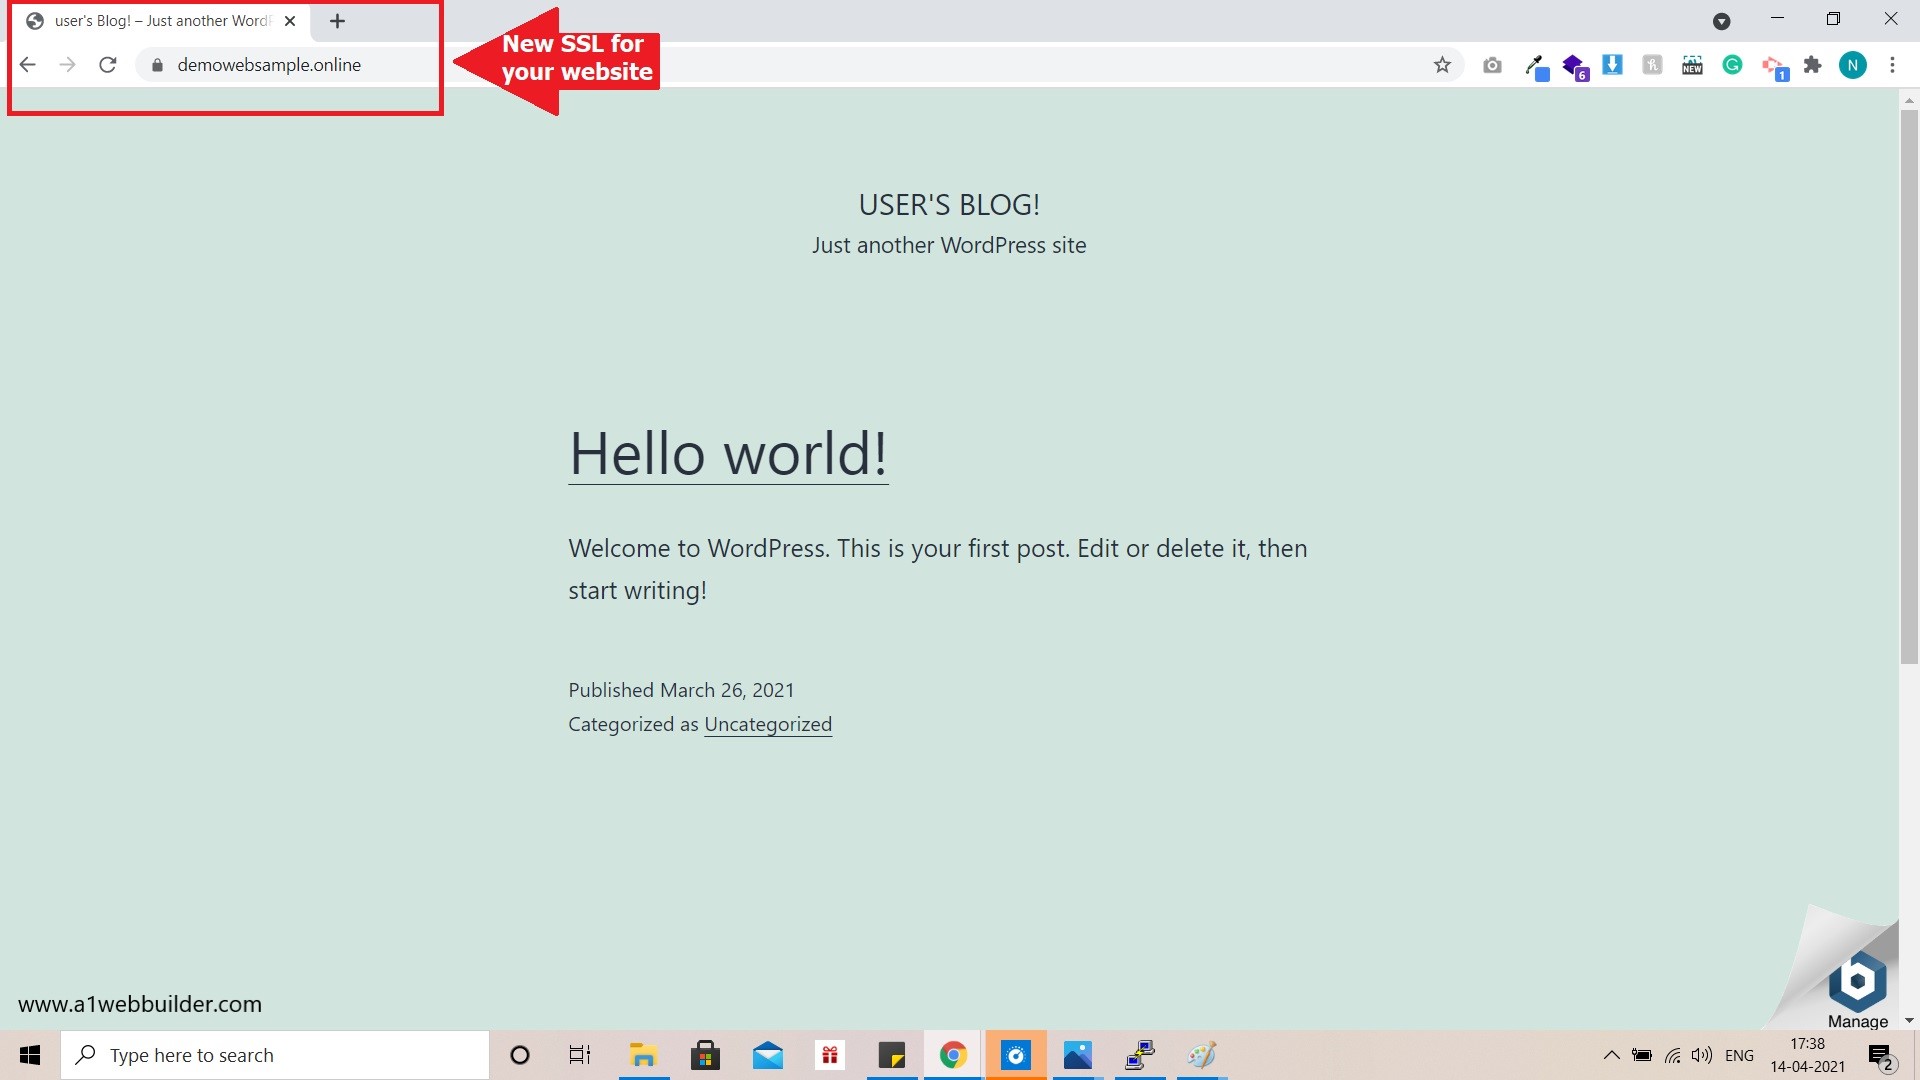
“In just a few minutes, your SSL setup will be applied to your WordPress domain, and you can securely access your website with the SSL certificate enabled.”
We as a team at A1webbuilder are highly skilled and qualified to develop and protect your website with a premium facility and quality service including the industry’s standard. We can deliver your website within your time frame and provide the best result. Feel free to discuss your new project or business goal, call us on +91 7208 328 691, contact us or drop us a mail at info@a1webbuilder.com.